
Basic Changes in LinuxCNC (translated from Polish)
Originally written in Polish and translated into English. An English version by the author is also available: Basic Changes in LinuxCNC.

Contents
Once properly configured, LinuxCNC works correctly. Still, we will sometimes want to change a few options, such as the key configuration or how the program behaves. That is not easy, because some settings are stored in .ini configuration files and others in the axis file, which is written in Python. Below we present the basic changes that make working with the program easier.
1. Changes in the .ini file
Every run of Stepconf overwrites our changes, so it is better to carry out any further axis configuration directly in the .ini file, or to copy the modified file to another safe place.
1.1. Maximum jog speed after the program starts
By default the jog speed is set to a few dozen percent right after LinuxCNC starts. At the beginning we usually want to move the machine as fast as possible, to set the starting point or to drive an axis to a particular place. Constantly setting the speed to maximum is annoying.
We make the change in the .ini file in the linuxcnc/config/ directory, in the [DISPLAY] section. It lists the minimum, maximum and default speeds.
MIN_LINEAR_VELOCITY = 0
MAX_LINEAR_VELOCITY = 50.00 (mm/s)
DEFAULT_LINEAR_VELOCITY = 5.00 - change this to the maximum, i.e. 50
1.2. Incremental jogging
We make this change in the .ini file too, in the [DISPLAY] section. By default the increments are very fine, beyond what home-made machines can achieve. You can therefore delete those in the thousandths or even hundredths of a millimetre so they do not get in the way when switching.
INCREMENTS = 5mm 1mm .5mm .1mm .05mm .01mm .005mm1.3. Startup image
This is just a gimmick, but it is always nice to see your own creation at startup, or to shorten the time of the splash screen. We change this in the [DISPLAY] section of the .ini file as well. The image must be a .gif and be located next to the .ini file.
INTRO_GRAPHIC = linuxcnc.gif - you can add your own image
INTRO_TIME = 3
1.4. NGCGUI: additional tabs for quick milling
After adding the sections below, we get additional tabs containing mini-programs. With them we can quickly set up milling of the patterns we use most often, such as a pattern of holes, a slot or a pocket. It is enough to enter the quantity and dimensions, and the program is generated automatically. In practice this is useful, but the default programs are full of bugs and do not work perfectly, and writing your own is troublesome. In my opinion it is better to prepare the G-code in external programs. The setup is described below, with the sections in which to enter the respective settings.
[DISPLAY]
#===================NGCGUI=========================
TKPKG = Ngcgui 1.0
TKPKG = Ngcguittt 1.0
# Ngcgui must be before Ngcguittt
NGCGUI_FONT = Helvetica -12 normal
NGCGUI_PREAMBLE = mm_std.ngc
# here type the names of our programs, paths are in the section
[RS274NGC]
NGCGUI_SUBFILE = helix.ngc
NGCGUI_SUBFILE = helix_rtheta.ngc
NGCGUI_SUBFILE = iquad.ngc
NGCGUI_SUBFILE = arc1.ngc
NGCGUI_SUBFILE = arc2.ngc
NGCGUI_SUBFILE = hole_circle.ngc
NGCGUI_SUBFILE = qpocket.ngc
NGCGUI_SUBFILE = slot.ngc
# symbol "" opens an empty tab
NGCGUI_SUBFILE = ""
NGCGUI_OPTIONS = noremove
#NGCGUI_OPTIONS = opt1 opt2 ...
# available options:
# nonew -- prevents creating a new tab
# noremove -- prevents removing any tab
# noauto -- no auto-sending (makeFile, sent manually)
# noiframe -- images displayed in a separate window on top
GCMC_INCLUDE_PATH = /home/myname/gcmc_includes
# enable the text engraving generator
TTT = truetype-tracer
TTT_PREAMBLE = mm_std.ngc
PROGRAM_PREFIX = ../../nc_files/examples/ngcgui_lib
#==================================================
[RS274NGC]
PARAMETER_FILE = linuxcnc.var
#======================NGCGUI======================
# path to the ngcgui files
SUBROUTINE_PATH = ../../nc_files/examples/ngcgui_lib:../../nc_files/examples/ngcgui_lib/utilitysubs
USER_M_PATH = ../../nc_files/ngcgui_lib/mfiles
#==================================================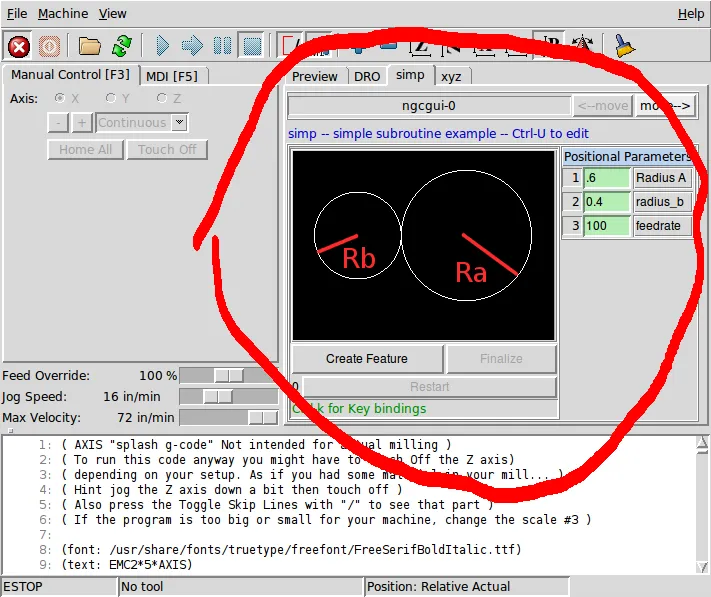
Figure 1.4. NGCGUI tabs
2. Changes in the axis file
The axis file is written in the Python programming language. To get to it we need administrator permissions. In Debian press Alt+F2 and type gksu thunar (gksu nautilus in Ubuntu). The file is located in the usr/bin directory. Open it in a text editor and get to work.
2.1. Keys
To operate the machine more comfortably from the keyboard, or to adapt it to our controller, we need to find the section below with the list of keys and their functions. The example below is our key layout adapted to a PlayStation 3 pad. The changes are:
- Escape key reaction disabled (#nothing)
- all important functions work without Shift, that is with lowercase letters
- homing of all axes works without Ctrl
root_window.bind("<Escape>", "#nothing")
root_window.bind("l", commands.toggle_override_limits)
root_window.bind("o", commands.open_file)
root_window.bind("s", commands.task_resume)
root_window.bind("t", commands.task_step)
root_window.bind("p", commands.task_pause)
root_window.bind("v", commands.cycle_view)
root_window.bind("<Alt-p>", "#nothing")
root_window.bind("r", commands.task_run)
root_window.bind("<Control-r>", commands.reload_file)
root_window.bind("<Control-s>", commands.save_gcode)
root_window.bind_class("all", "<Key-F1>", commands.estop_clicked)
root_window.bind("<Key-F2>", commands.onoff_clicked)
root_window.bind("<Key-F7>", commands.mist_toggle)
root_window.bind("<Key-F8>", commands.flood_toggle)
root_window.bind("<Key-F9>", commands.spindle_forward_toggle)
root_window.bind("<Key-F10>", commands.spindle_backward_toggle)
root_window.bind("<Key-F11>", commands.spindle_decrease)
root_window.bind("<Key-F12>", commands.spindle_increase)
root_window.bind("B", commands.brake_on)
root_window.bind("b", commands.brake_off)
root_window.bind("q", commands.clear_live_plot)
root_window.bind("x", lambda event: activate_axis(0))
root_window.bind("y", lambda event: activate_axis(1))
root_window.bind("z", lambda event: activate_axis(2))
root_window.bind("a", lambda event: activate_axis(3))
root_window.bind("`", lambda event: activate_axis_or_set_feedrate(0))
root_window.bind("1", lambda event: activate_axis_or_set_feedrate(1))
root_window.bind("2", lambda event: activate_axis_or_set_feedrate(2))
root_window.bind("3", lambda event: set_feedrate(5))
root_window.bind("4", lambda event: set_feedrate(20))
root_window.bind("5", lambda event: set_feedrate(35))
root_window.bind("6", lambda event: set_feedrate(50))
root_window.bind("7", lambda event: set_feedrate(65))
root_window.bind("8", lambda event: set_feedrate(80))
root_window.bind("9", lambda event: set_feedrate(90))
root_window.bind("0", lambda event: set_feedrate(100))
root_window.bind("c", lambda event: jogspeed_continuous())
root_window.bind("d", lambda event: widgets.rotate.invoke())
root_window.bind("i", lambda event: jogspeed_incremental())
root_window.bind("k", lambda event: jogspeed_incremental(-1))
root_window.bind("!", "set metric [expr {!$metric}]; redraw")
root_window.bind("@", commands.toggle_display_type)
root_window.bind("#", commands.toggle_coord_type)
root_window.bind("$", commands.toggle_teleop_mode)  #old version: commands.toggle_joint_mode
root_window.bind("<Control-Home>", commands.home_axis)
root_window.bind("<KP_Home>", kp_wrap(commands.home_axis, "KeyPress"))
root_window.bind("<Home>", commands.home_all_axes)
root_window.bind("<Shift-Home>", commands.set_axis_offset)
root_window.bind("<End>", commands.touch_off_system) #old version: commands.touch_off
root_window.bind("<Control-KP_Home>", kp_wrap(commands.home_all_axes, "KeyPress"))
root_window.bind("<Shift-KP_Home>", kp_wrap(commands.set_axis_offset, "KeyPress"))
root_window.bind("<KP_End>", kp_wrap(commands.touch_off_system, "KeyPress")) #old version: commands.touch_off
widgets.mdi_history.bind("<Configure>", "%W see end" )
widgets.mdi_history.bind("<ButtonRelease-1>", commands.mdi_history_butt_1)
widgets.mdi_history.bind("<Double-Button-1>", commands.mdi_history_double_butt_1)
widgets.mdi_command.unbind("<Control-h>")
widgets.mdi_command.bind("<Control-m>", commands.clear_mdi_history)
widgets.mdi_command.bind("<Control-h>", commands.mdi_history_hist2clip)
widgets.mdi_command.bind("<Control-Shift-H>", commands.mdi_history_clip2hist)
widgets.mdi_command.bind("<Key-Return>", commands.send_mdi)
widgets.mdi_command.bind("<Up>", commands.mdi_up_cmd)
widgets.mdi_command.bind("<Down>", commands.mdi_down_cmd)
widgets.mdi_command.bind("<Key-KP_Enter>", commands.send_mdi)
widgets.mdi_command.bind("<KP_Up>", commands.mdi_up_cmd)
widgets.mdi_command.bind("<KP_Down>", commands.mdi_down_cmd)
widgets.mdi_command.bind("<KeyRelease-minus>", "break")
widgets.mdi_command.bind("<KeyRelease-equal>", "break")
This example is for LinuxCNC 2.7.3 (in 2.6 you need to replace the names of the 3 functions marked with comments).
2.2. Slower/faster speed with just two keys
By default, specific feed rate values are assigned to the keys 0 to 9 and “`”. We changed the function of keys 1 and 2 to decrease and increase the speed by 5%. As in example 2.1, these keys are bound to the function activate_axis_or_set_feedrate. We changed its contents as below. The remaining number keys are bound to the function set_feedrate(n), each with a specific percentage feed value. This is one of the most basic changes and makes work easier.
def set_feedrate(n):
    widgets.feedoverride.set(n)
def set_rapidrate(n):
    widgets.rapidoverride.set(n)
def activate_axis_or_set_feedrate(n):
    ustawiona_predkosc = widgets.feedoverride.get()
    if n == 0:
        set_feedrate(0)
    if n == 1:
        ustawiona_predkosc -= 5
        if ustawiona_predkosc < 0:
            ustawiona_predkosc = 0
        set_feedrate(ustawiona_predkosc)
    if n == 2:
        ustawiona_predkosc += 5
        if ustawiona_predkosc > 100:
            ustawiona_predkosc = 100
        set_feedrate(ustawiona_predkosc)
Pay attention to the indentation, otherwise the program will not work!
2.3. Slower/faster speed in LinuxCNC 2.7 (for manual jogging)
In LinuxCNC 2.7 the speed change function, more precisely the feed override, does not work when positioning the machine manually, although it works fine in automatic mode. We can either move the jog speed slider by hand or go back to the settings from LinuxCNC 2.6. We change the function jog_on(a,b) as below:
def jog_on(a, b):
    if not manual_ok(): return
    if not manual_tab_visible(): return
    if isinstance(a, (str, unicode)):
        a = "xyzabcuvws".index(a)
    if a < 3:
        if vars.metric.get(): b = b / 25.4
        b = from_internal_linear_unit(b)
    if jog_after[a]:
        root_window.after_cancel(jog_after[a])
        jog_after[a] = None
        return
    b = b*vars.feedrate.get()/100.0
    jogincr = widgets.jogincr.get()
    if s.motion_mode == linuxcnc.TRAJ_MODE_TELEOP:
        if jogincr != _("Continuous"):
            jogging[a] = 0
            print "WARNING: do not allow incremental jogging in TELEOP mode"
        else:
            jogging[a] = b
        jog_cont[a] = True
        cartesian_only=jogging[:6]
        c.teleop_vector(*cartesian_only)
    else:
        if jogincr != _("Continuous"):
            s.poll()
            if s.state != 1: return
            distance = parse_increment(jogincr)
            jog(linuxcnc.JOG_INCREMENT, a, b, distance)
            jog_cont[a] = False
        else:
            jog(linuxcnc.JOG_CONTINUOUS, a, b)
            jog_cont[a] = True
            jogging[a] = b
2.4. Fullscreen
It is enough to add the line below to the axis file, with the resolution of our monitor.
root_window.tk.call("wm","geometry",".","1920x1080")or, if that works (in an old version on Ubuntu):
maxgeo=root_window.tk.call("wm","maxsize",".")
fullsize=maxgeo.split(' ')[0] + 'x' + maxgeo.split(' ')[1]
root_window.tk.call("wm","geometry",".",fullsize)
3. Autostart
Go to Applications/Settings/Session and Startup. Click the Add button, enter any name, for example LinuxCNC, and in the command field add the path to your own .ini file:
usr/bin/linuxcnc '/home/linuxcnc/linuxcnc/configs/Fox_conf/Fox_conf.ini'or, if that does not work (in the case of LinuxCNC 2.7):
/usr/bin/linuxcnc '/home/linuxcnc/linuxcnc/configs/Fox_conf/Fox_conf.ini'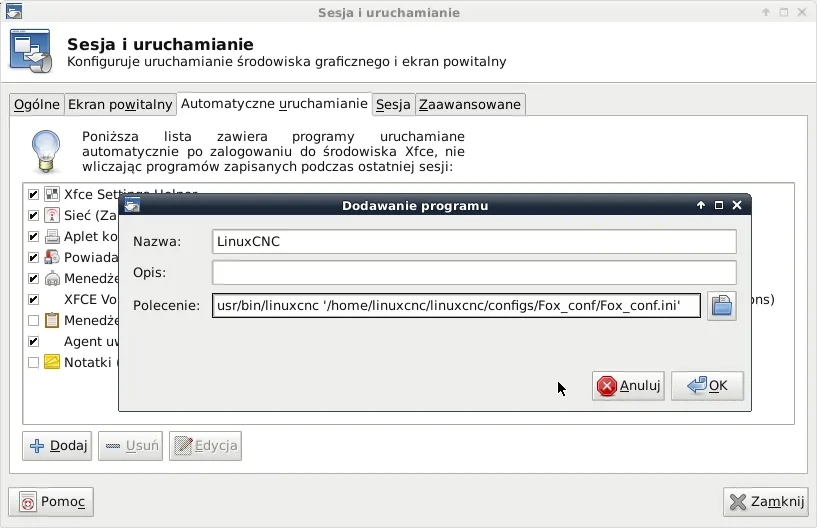
Figure 3. Autostart setting in LinuxCNC
4. Autologin
Normally in Debian there is no option, in the system or during installation, to disable autologin. We have to do it manually in the lightdm.conf file, with administrator permissions of course. The file is located in the etc/lightdm/ directory, where we look for the [SeatDefaults] section. We need to uncomment the lines and add our user name as below:
autologin-user=linuxcnc
autologin-user-timeout=1
5. Installing essential programs
Debian does not come with basic programs such as a calculator and a good file editor. To install a program, go to Applications/Settings/Synaptic Package Manager. We need to know the name of the program, for example Qalculate (calculator) or gedit (text editor). Click the search icon, type the program name, select the item for installation with the left mouse button and apply the changes with the green tick.
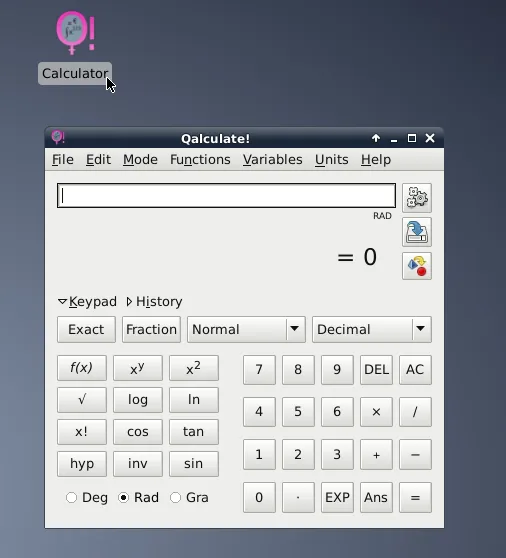
Figure 5a. Qalculate installed
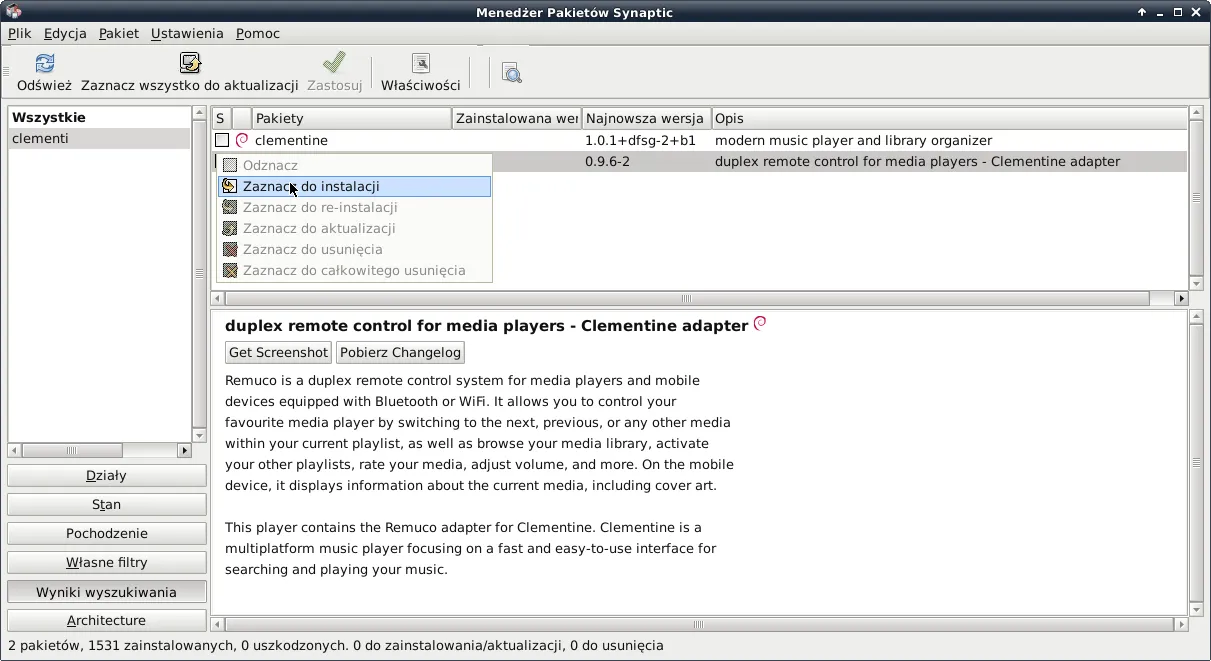
Figure 5b. Synaptic Package Manager
6. Disabling the screen saver
If we want the machine to run smoothly while using a lower base period jitter value, we should disable the screen saver. In our case, during long machining jobs and with a slightly too low jitter value, the machine could hang and travel too far in one axis. Go to Applications/Settings/Screen Saver, where you will find the option to disable it.
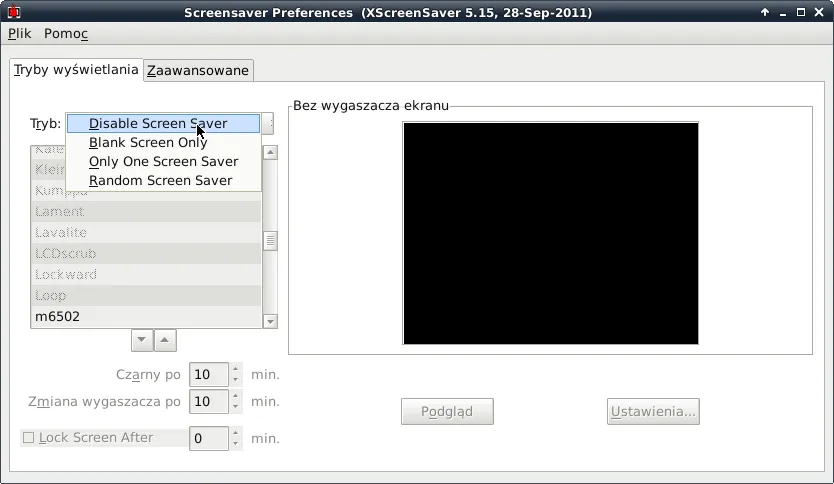
Figure 6. Disabling the screen saver
7. Installing HeeksCAD in LinuxCNC
HeeksCAD is a very useful and simple program for designing parts and generating G-code. After installing it on the LinuxCNC system, we can send the generated code to the machine with a single button. It is a very good alternative to the NGCGUI tabs: it is much easier to create code in HeeksCAD than to program code for NGCGUI by hand. Unfortunately (at least at the time of writing) we have to compile the program ourselves. Instructions are available at: https://blog.cyplo.net/2015/05/28/cnc-workflow/. The whole compilation is described below.
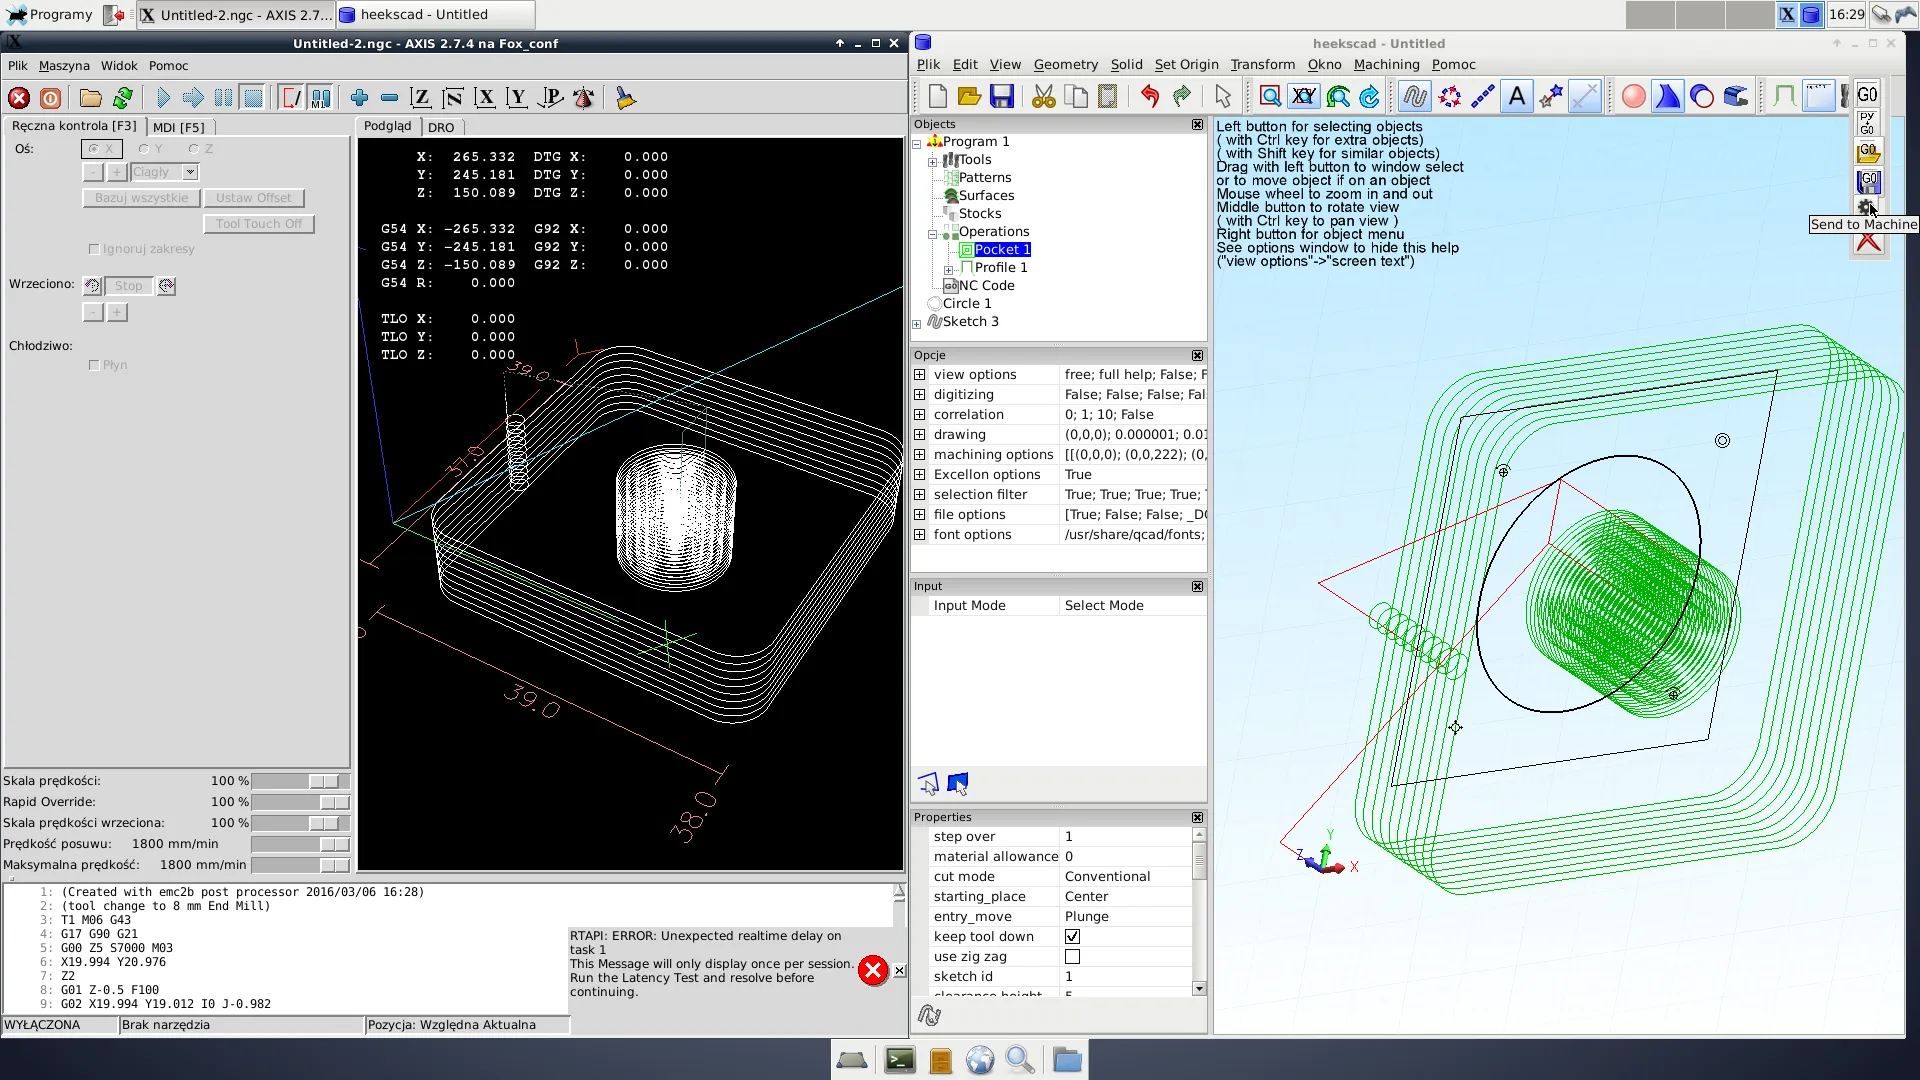
Figure 6. Sending G-code to LinuxCNC in HeeksCAD
Update the package lists:
sudo apt-get updateInstall the required libraries:
sudo apt-get install subversion build-essential debhelper cmake libboost-python-dev liboce-visualization-dev libwxgtk2.8-dev libgtkglext1-dev python-dev python-area bzr git libboost-dev liboce-ocaf2 liboce-ocaf-dev oce-drawCreate a new directory named HeeksCAD, by default in /home:
mkdir heekscadEnter the heekscad directory:
cd heekscadFetch the sources:
svn checkout http://libarea.googlecode.com/svn/trunk/ libareaEnter the trunk directory:
cd libarea/trunkBuild the packages:
dpkg-buildpackage -b -us -ucGo up one level:
cd ..Install the required libraries:
sudo dpkg -i libarea*.deb python-area*.deb
cd ..
Download the HeeksCAD source:
svn checkout http://heekscad.googlecode.com/svn/trunk/ heekscad
cd heekscad
sudo apt-get install wx2.8-i18n
cd ..
Install HeeksCAD:
sudo dpkg -i *heeks*.debInstall HeeksCNC (on top of the previously installed HeeksCAD):
svn checkout http://heekscnc.googlecode.com/svn/trunk/ heekscnc
cd heekscnc
dpkg-buildpackage -b -us -uc
cd ..
git clone https://github.com/aewallin/opencamlib.git
cd opencamlib
bzr branch lp:~neomilium/opencamlib/packaging debian
dpkg-buildpackage -b -us -uc -d
cd ..
sudo dpkg -i python-ocl*.deb
sudo dpkg -i heekscnc*.deb