
Things to Do After Installing LinuxCNC

Contents
The LinuxCNC distro works correctly after installation, but we will want to change some options, such as the key configuration or how the program operates. It is not a simple task: not every setting has a graphical manager, and some changes have to be made in .ini files or in the axis file, which is written in Python. We will also use a few terminal commands. Below you can find the more important changes first, followed by the less essential ones. Let’s get to work.
1. First of all: install the updates!
In the top right corner you will see an arrow icon inside an orange star, or something similar. Right after installing LinuxCNC, click it, type your password and install the updates.
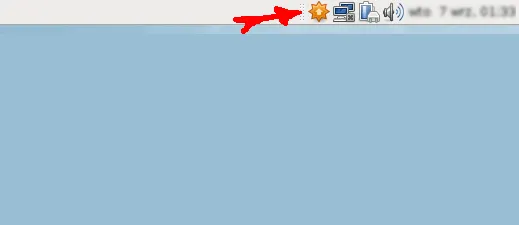
Figure 1. Update notification in Debian
2. Changes in the .ini file
If you do this, do not change options with Stepconf afterwards! Otherwise all the settings you made will be reset to their defaults before your .ini modifications.
2.1. Maximum jog speed after the program starts
It is annoying to have to move the slider every time the program starts. At the start we usually need maximum speed, for example to set the zero position. The option to change it is hidden in the .ini file, in the linuxcnc/config folder in your home directory, in the [DISPLAY] section. Change the default value as shown below:
MIN_LINEAR_VELOCITY = 0
MAX_LINEAR_VELOCITY = 50.00 (mm/s)
DEFAULT_LINEAR_VELOCITY = 5.00 - change this to maximum value
2.2. Increments
On home-made machines you cannot always reach an accuracy as high as 0.005 mm, so it is annoying to cycle through so many increments (useless ones in our case) with the keyboard. We can change this in the .ini file as well, in the [DISPLAY] section. Just delete the values you do not need, or add more.
INCREMENTS = 5mm 1mm .5mm .1mm .05mm .01mm .005mm2.3. Startup image
If you want, you can customize the loading screen. The settings are also in the [DISPLAY] section: just the image name and the display time. The picture must be a .gif located in the config folder, otherwise it will not work.
INTRO_GRAPHIC = linuxcnc.gif
INTRO_TIME = 3
2.4. NGCGUI: additional tabs for quick milling
If you are good at writing advanced G-code by hand, you can use these options, or just use the files created by the LinuxCNC developers (we do not recommend it, as they contain many bugs). NGCGUI tabs are like micro-programs: you fill in a few parameters, such as a radius or a number of holes, and get a custom milling operation. It is a good solution for routine milling where you need to change parameters like these. For us it is useless, since we use external programs. But if you want to add this to your .ini file, go to the [DISPLAY] and [RS274NGC] sections and add the lines below. There is a much better alternative: HeeksCAD. You can easily draw an object, generate the code, and send it directly to LinuxCNC with one click.
[DISPLAY]
#===================NGCGUI=========================
TKPKG = Ngcgui 1.0
TKPKG = Ngcguittt 1.0
# Ngcgui must be before Ngcguittt
NGCGUI_FONT = Helvetica -12 normal
NGCGUI_PREAMBLE = mm_std.ngc
# here type names of your programs
[RS274NGC]
NGCGUI_SUBFILE = helix.ngc
NGCGUI_SUBFILE = helix_rtheta.ngc
NGCGUI_SUBFILE = iquad.ngc
NGCGUI_SUBFILE = arc1.ngc
NGCGUI_SUBFILE = arc2.ngc
NGCGUI_SUBFILE = hole_circle.ngc
NGCGUI_SUBFILE = qpocket.ngc
NGCGUI_SUBFILE = slot.ngc
# symbol "" opens empty tab
NGCGUI_SUBFILE = ""
NGCGUI_OPTIONS = noremove
#NGCGUI_OPTIONS = opt1 opt2 ...
# available options:
# nonew -- prevent from creating new tab
# noremove -- prevent from removing tabs
# noauto -- no autofilling
# noiframe -- images displaying in new window
GCMC_INCLUDE_PATH = /home/myname/gcmc_includes
# turning on engraving generator
TTT = truetype-tracer
TTT_PREAMBLE = mm_std.ngc
PROGRAM_PREFIX = ../../nc_files/examples/ngcgui_lib
#==================================================
[RS274NGC]
PARAMETER_FILE = linuxcnc.var
#======================NGCGUI======================
# path to ngcgui files
SUBROUTINE_PATH = ../../nc_files/examples/ngcgui_lib:../../nc_files/examples/ngcgui_lib/utilitysubs
USER_M_PATH = ../../nc_files/ngcgui_lib/mfiles
#==================================================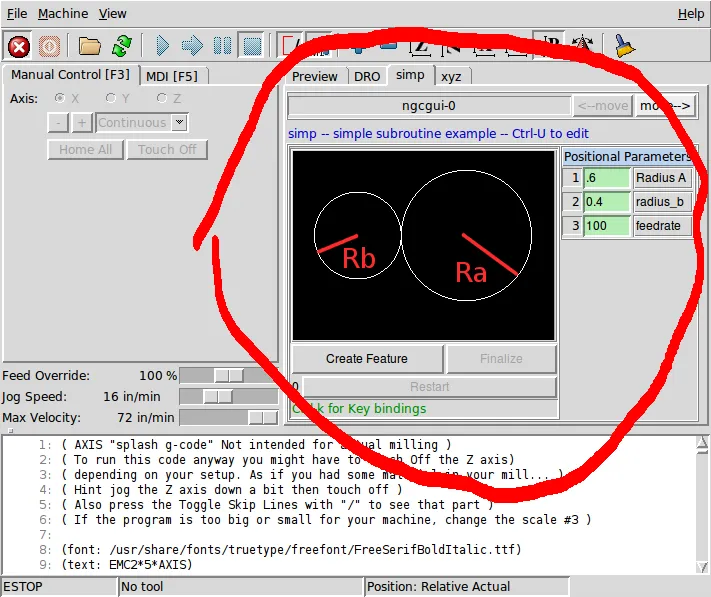
Figure 2.4. NGCGUI tabs in LinuxCNC
3. Changes in the axis file
The axis file is written in Python, but it is not that simple to edit, because we need root permissions to open it. Press Alt+F2 and type gksu thunar (gksu nautilus in Ubuntu), or run sudo thunar (sudo nautilus) in a terminal. The axis file is located in the usr/bin directory. Open it with gedit or mousepad and you are ready to make changes. Make a backup first!
3.1. Keys
Sometimes we want to use an external controller with our machine, and then there is a problem with the keys: the functions are not bound to the keys we want to use. In our gamepad controller article we used a PlayStation 3 pad to control the machine. We need to change the following:
- the Escape key should do nothing
- the keys should not require Alt, Shift or Ctrl
Open axis as root and modify the options below:
root_window.bind("<Escape>", "#nothing")
root_window.bind("l", commands.toggle_override_limits)
root_window.bind("o", commands.open_file)
root_window.bind("s", commands.task_resume)
root_window.bind("t", commands.task_step)
root_window.bind("p", commands.task_pause)
root_window.bind("v", commands.cycle_view)
root_window.bind("<Alt-p>", "#nothing")
root_window.bind("r", commands.task_run)
root_window.bind("<Control-r>", commands.reload_file)
root_window.bind("<Control-s>", commands.save_gcode)
root_window.bind_class("all", "<Key-F1>", commands.estop_clicked)
root_window.bind("<Key-F2>", commands.onoff_clicked)
root_window.bind("<Key-F7>", commands.mist_toggle)
root_window.bind("<Key-F8>", commands.flood_toggle)
root_window.bind("<Key-F9>", commands.spindle_forward_toggle)
root_window.bind("<Key-F10>", commands.spindle_backward_toggle)
root_window.bind("<Key-F11>", commands.spindle_decrease)
root_window.bind("<Key-F12>", commands.spindle_increase)
root_window.bind("B", commands.brake_on)
root_window.bind("b", commands.brake_off)
root_window.bind("q", commands.clear_live_plot)
root_window.bind("x", lambda event: activate_axis(0))
root_window.bind("y", lambda event: activate_axis(1))
root_window.bind("z", lambda event: activate_axis(2))
root_window.bind("a", lambda event: activate_axis(3))
root_window.bind("`", lambda event: activate_axis_or_set_feedrate(0))
root_window.bind("1", lambda event: activate_axis_or_set_feedrate(1))
root_window.bind("2", lambda event: activate_axis_or_set_feedrate(2))
root_window.bind("3", lambda event: set_feedrate(5))
root_window.bind("4", lambda event: set_feedrate(20))
root_window.bind("5", lambda event: set_feedrate(35))
root_window.bind("6", lambda event: set_feedrate(50))
root_window.bind("7", lambda event: set_feedrate(65))
root_window.bind("8", lambda event: set_feedrate(80))
root_window.bind("9", lambda event: set_feedrate(90))
root_window.bind("0", lambda event: set_feedrate(100))
root_window.bind("c", lambda event: jogspeed_continuous())
root_window.bind("d", lambda event: widgets.rotate.invoke())
root_window.bind("i", lambda event: jogspeed_incremental())
root_window.bind("k", lambda event: jogspeed_incremental(-1))
root_window.bind("!", "set metric [expr {!$metric}]; redraw")
root_window.bind("@", commands.toggle_display_type)
root_window.bind("#", commands.toggle_coord_type)
root_window.bind("$", commands.toggle_teleop_mode)  #old version: commands.toggle_joint_mode
root_window.bind("<Control-Home>", commands.home_axis)
root_window.bind("<KP_Home>", kp_wrap(commands.home_axis, "KeyPress"))
root_window.bind("<Home>", commands.home_all_axes)
root_window.bind("<Shift-Home>", commands.set_axis_offset)
root_window.bind("<End>", commands.touch_off_system) #old version: commands.touch_off
root_window.bind("<Control-KP_Home>", kp_wrap(commands.home_all_axes, "KeyPress"))
root_window.bind("<Shift-KP_Home>", kp_wrap(commands.set_axis_offset, "KeyPress"))
root_window.bind("<KP_End>", kp_wrap(commands.touch_off_system, "KeyPress")) #old version: commands.touch_off
widgets.mdi_history.bind("<Configure>", "%W see end" )
widgets.mdi_history.bind("<ButtonRelease-1>", commands.mdi_history_butt_1)
widgets.mdi_history.bind("<Double-Button-1>", commands.mdi_history_double_butt_1)
widgets.mdi_command.unbind("<Control-h>")
widgets.mdi_command.bind("<Control-m>", commands.clear_mdi_history)
widgets.mdi_command.bind("<Control-h>", commands.mdi_history_hist2clip)
widgets.mdi_command.bind("<Control-Shift-H>", commands.mdi_history_clip2hist)
widgets.mdi_command.bind("<Key-Return>", commands.send_mdi)
widgets.mdi_command.bind("<Up>", commands.mdi_up_cmd)
widgets.mdi_command.bind("<Down>", commands.mdi_down_cmd)
widgets.mdi_command.bind("<Key-KP_Enter>", commands.send_mdi)
widgets.mdi_command.bind("<KP_Up>", commands.mdi_up_cmd)
widgets.mdi_command.bind("<KP_Down>", commands.mdi_down_cmd)
widgets.mdi_command.bind("<KeyRelease-minus>", "break")
widgets.mdi_command.bind("<KeyRelease-equal>", "break")
This is an example for LinuxCNC 2.7. In 2.6 you need to replace the functions marked with the #old version comments.
3.2. Slower/faster speed with just two keys
This is the most useful modification! By default you can choose a percentage speed with the keys 1 to 0 on the keyboard: 1 is 10%, 2 is 20%, the other keys follow the same pattern, and 0 is 100%. We want the key before “1” to set 0%, key “1” to decrease the speed by 5%, and key “2” to increase it. This is also very useful for our PS3 pad, as described above. The key bindings should be modified as in section 3.1 for this to work correctly. We need to change the function activate_axis_or_set_feedrate(n):
def set_feedrate(n):
    widgets.feedoverride.set(n)
def set_rapidrate(n):
    widgets.rapidoverride.set(n)
def activate_axis_or_set_feedrate(n):
    speed_change = widgets.feedoverride.get()
    if n == 0:
        set_feedrate(0)
    if n == 1:
        speed_change -= 5
        if speed_change < 0:
            speed_change = 0
        set_feedrate(speed_change)
    if n == 2:
        speed_change += 5
        if speed_change > 100:
            speed_change = 100
        set_feedrate(speed_change)
Beware! It is important to keep the indentation exactly as above, otherwise it will not work!
3.3. Slower/faster speed in manual mode (LinuxCNC 2.7)
In LinuxCNC 2.7, feed override does not work correctly in manual mode. It only works during automatic milling. There is always a workaround: use the old 2.6 settings in axis, or simply move the jog speed slider by hand, which is annoying (recommended only for noobs :P). The function we have to change is jog_on(a,b), as below:
def jog_on(a, b):
    if not manual_ok(): return
    if not manual_tab_visible(): return
    if isinstance(a, (str, unicode)):
        a = "xyzabcuvws".index(a)
    if a < 3:
        if vars.metric.get(): b = b / 25.4
        b = from_internal_linear_unit(b)
    if jog_after[a]:
        root_window.after_cancel(jog_after[a])
        jog_after[a] = None
        return
    b = b*vars.feedrate.get()/100.0
    jogincr = widgets.jogincr.get()
    if s.motion_mode == linuxcnc.TRAJ_MODE_TELEOP:
        if jogincr != _("Continuous"):
            jogging[a] = 0
            print "WARNING: do not allow incremental jogging in TELEOP mode"
        else:
            jogging[a] = b
        jog_cont[a] = True
        cartesian_only=jogging[:6]
        c.teleop_vector(*cartesian_only)
    else:
        if jogincr != _("Continuous"):
            s.poll()
            if s.state != 1: return
            distance = parse_increment(jogincr)
            jog(linuxcnc.JOG_INCREMENT, a, b, distance)
            jog_cont[a] = False
        else:
            jog(linuxcnc.JOG_CONTINUOUS, a, b)
            jog_cont[a] = True
            jogging[a] = b
3.4. Starting LinuxCNC in fullscreen
This is simple. We only need to add the line below to the axis file and change the resolution to match our monitor:
root_window.tk.call("wm","geometry",".","1920x1080")In older Ubuntu versions, use this instead:
maxgeo=root_window.tk.call("wm","maxsize",".")
fullsize=maxgeo.split(' ')[0] + 'x' + maxgeo.split(' ')[1]
root_window.tk.call("wm","geometry",".",fullsize)
4. Autostart
In Debian, go to Applications menu/Settings/Session and Startup, add an entry, and enter the command with the path to your configuration .ini file as below. You can test it in a terminal instead of rebooting constantly.
usr/bin/linuxcnc '/home/linuxcnc/linuxcnc/configs/Fox_conf/Fox_conf.ini'If that does not work (in LinuxCNC 2.7), use:
/usr/bin/linuxcnc '/home/linuxcnc/linuxcnc/configs/Fox_conf/Fox_conf.ini'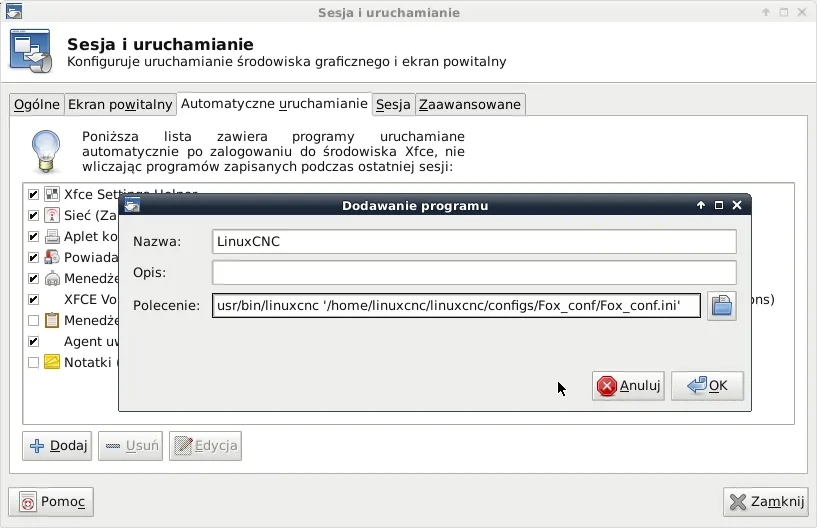
Figure 4. Autostart setting in LinuxCNC (Debian)
5. Autologin
In Debian there is no option to enable or disable autologin, not even during installation. It has to be done by hand in lightdm.conf, as root of course. The file is located in /etc/lightdm/ and the options are in the [SeatDefaults] section. Uncomment the lines below and enter your user name.
autologin-user=linuxcnc
autologin-user-timeout=1
6. Installing essential programs
In Debian we need to install some missing programs, such as a calculator (for example Qalculate!) and a text editor (we recommend gedit).
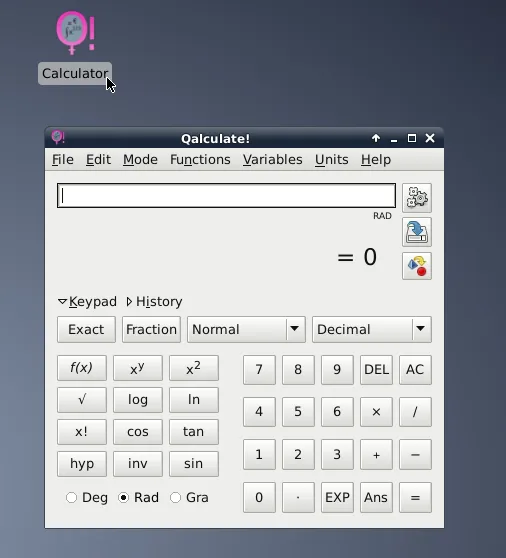
Figure 6a. Qalculate! installed on Debian
Go to Applications menu/Settings/Synaptic Package Manager, click the Search button and type the name of the program. Select it with the left mouse button and choose to install it. Then click the yellow “Apply” button.
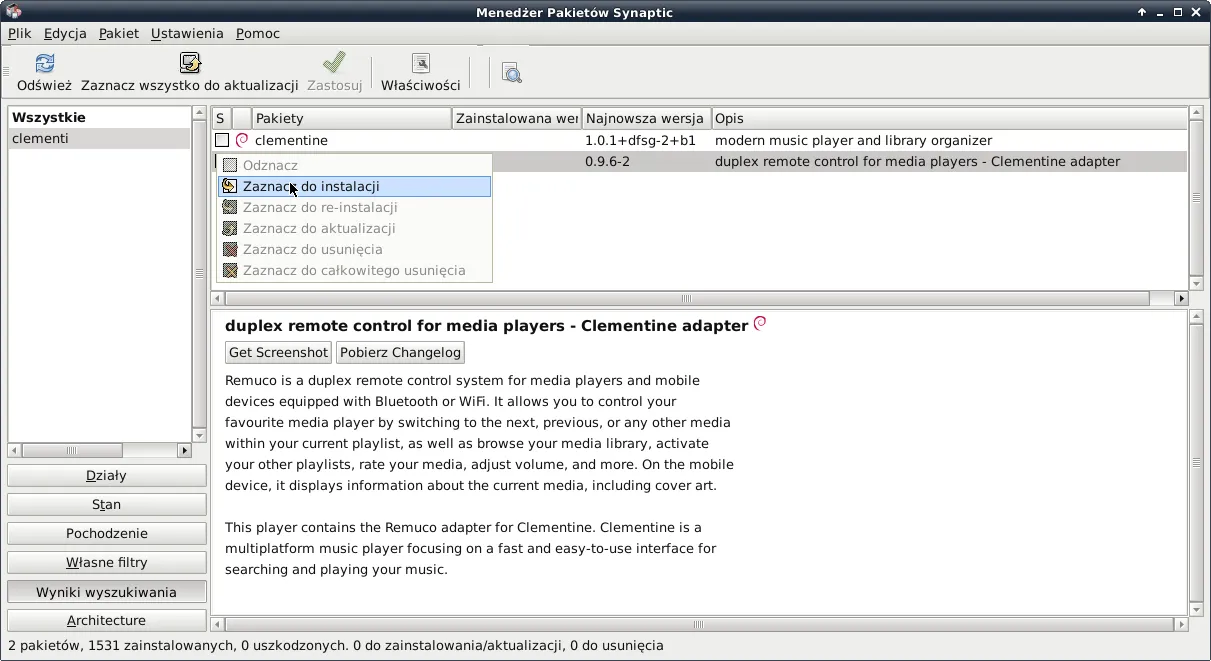
Figure 6b. Synaptic Package Manager
7. Disabling the screen saver
If you want the machine to run with a lower jitter than the default, and for other reasons, we recommend disabling the screen saver, or simply disabling it for safety. In our case there was a problem during a long milling job (even though we had lowered the jitter). The program was suspended for a while, but the milling movement in one axis continued. You can guess what happened next, and we had to start the operation from the beginning. You can disable the screen saver in Applications menu/Settings/Screen Saver.
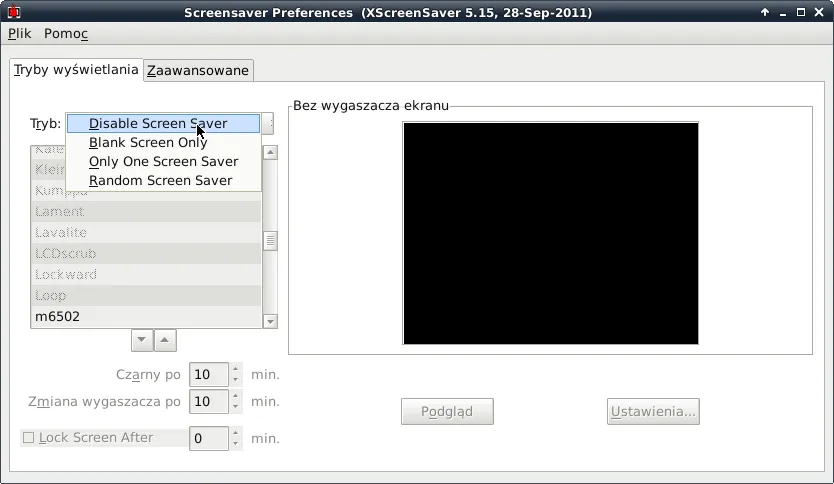
Figure 7. Disabling the screen saver
8. Installing HeeksCAD
HeeksCAD is a very powerful program and, at the time of writing, the best free program for CNC milling. On Debian it works only after compilation. The best part is that we can send the generated code directly to LinuxCNC with one click. Full installation instructions are available in Cyplo’s CNC workflow post and are described below.
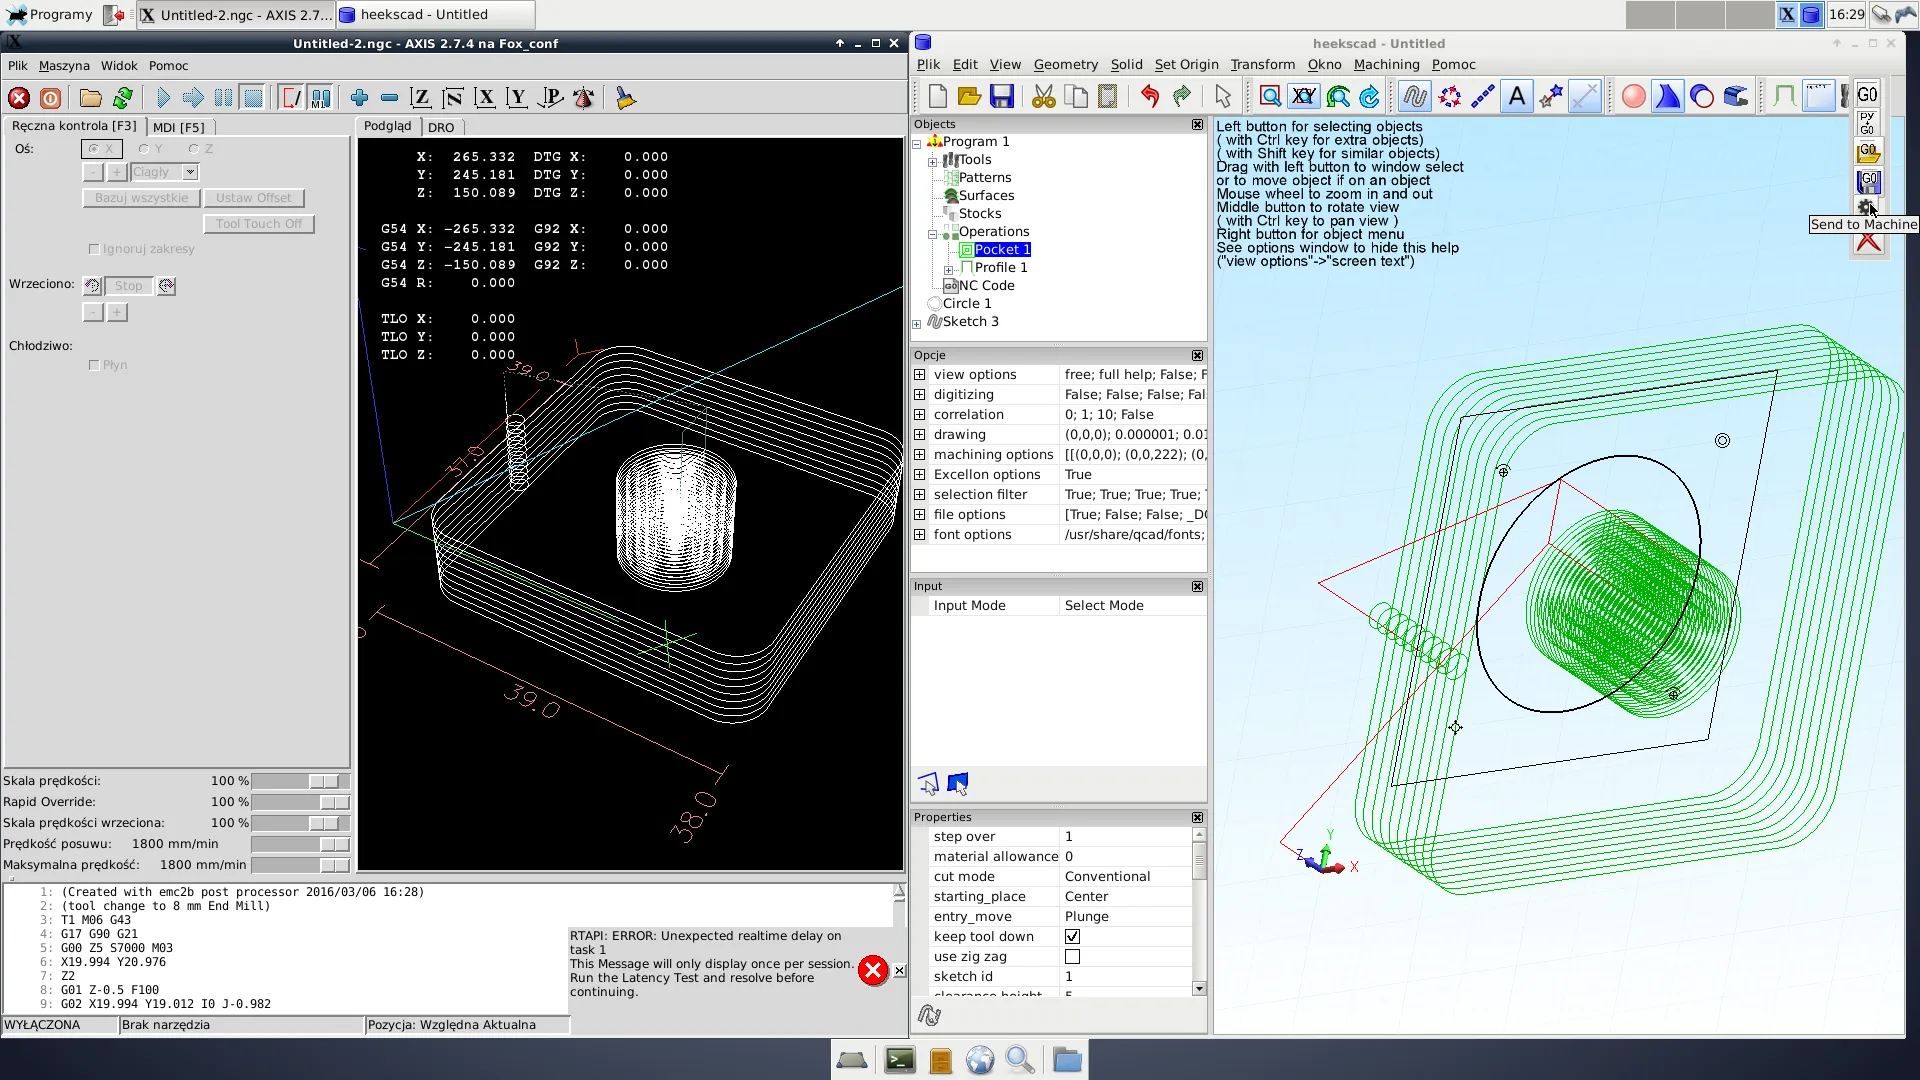
Figure 8. Sending G-code to the machine with HeeksCAD
Update the package lists:
sudo apt-get updateInstall the required libraries:
sudo apt-get install subversion build-essential debhelper cmake libboost-python-dev liboce-visualization-dev libwxgtk2.8-dev libgtkglext1-dev python-dev python-area bzr git libboost-dev liboce-ocaf2 liboce-ocaf-dev oce-drawCreate a “heekscad” directory (by default in your home directory):
mkdir heekscadEnter the “heekscad” directory:
cd heekscadFetch the sources:
svn checkout http://libarea.googlecode.com/svn/trunk/ libareaEnter the “trunk” directory:
cd libarea/trunkBuild the packages:
dpkg-buildpackage -b -us -ucGo up one level:
cd ..Install the .deb packages:
sudo dpkg -i libarea*.deb python-area*.deb
cd ..
Download the HeeksCAD source:
svn checkout http://heekscad.googlecode.com/svn/trunk/ heekscad
cd heekscad
sudo apt-get install wx2.8-i18n
cd ..
Install HeeksCAD:
sudo dpkg -i *heeks*.debInstall HeeksCNC (requires HeeksCAD to be installed):
svn checkout http://heekscnc.googlecode.com/svn/trunk/ heekscnc
cd heekscnc
dpkg-buildpackage -b -us -uc
cd ..
git clone https://github.com/aewallin/opencamlib.git
cd opencamlib
bzr branch lp:~neomilium/opencamlib/packaging debian
dpkg-buildpackage -b -us -uc -d
cd ..
sudo dpkg -i python-ocl*.deb
sudo dpkg -i heekscnc*.deb
Done! Do you have more ideas on how to improve milling with LinuxCNC? Is something not working for you? Write it in the comments section or contact us.