
CNC Mill Controller: Using a Gamepad with QjoyPad
Originally written in Polish and translated into English.
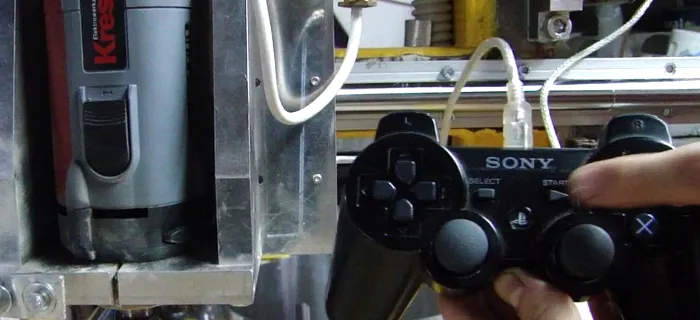
When working on a mill, you very often need to set the axes by hand, and from different sides of the machine. Walking around with a huge keyboard is inconvenient, and controlling the machine in mid-air is out of the question. You could build your own controller from scratch, for example based on a keyboard controller chip. That was our first idea, until we came across QjoyPad, a driver for computer game pads. We had a PS3 joystick at hand, it turned out to be compatible, so we got to work.
The latest LinuxCNC is based on Debian, so the installation and use are described on that system. The setup should work without problems on other Linux distributions. Installation is very simple: you just type the following commands into the terminal and press Enter. Installation information can be found here: http://ubuntnt.blogspot.com/2011/07/how-to-setup-sixaxis-controller-with.html. The latest software package, all the requirements and a list of supported pads are available at http://qjoypad.sourceforge.net/.
Installing QjoyPad
First we need to install a driver for our future controller. You can download the package from http://atrey.karlin.mff.cuni.cz/~vojtech/joystick/, where you will also find information about supported pads. To make it quicker, you can instead type this command in the terminal:
sudo apt-get install joystickQjoyPad uses Qt, so we have to install the Qt packages. Copy the whole line below, paste it into the terminal and confirm with Enter:
sudo apt-get install libqt4-core libqt4-dev qt4-dev-tools qt4-designer qt4-docQjoyPad also requires an X Window installation, e.g. from www.x.org. To make things easier, type the following command in the terminal:
sudo apt-get install libxtst6 libxtst-devNow we download and install the QjoyPad program. Use the “cd” command to go to the directory containing the file downloaded from the QjoyPad home page. In this example it is the downloads folder:
cd ~/downloadsThe command below unpacks the file qjoypad-4.1.0. If you have a different version, use its name instead:
tar xzf qjoypad-4.1.0.tar.gzThen, after going to the right directory, we compile the program:
cd qjoypad-4.1.0/src./configmakesudo make installDone!!! After this ordeal, it’s time to have some fun. We use a PlayStation 3 Sixaxis pad, the full package with accelerometers in, I think, six axes :P Before you start, it is worth adding the installed program to autostart. Go to Programs/Settings/Session and Startup, click the Add button, enter whatever name you like, e.g. QjoyPad, and in the command field enter the path Usr/local/bin/qjoypad. If you prefer to start it manually, just press Alt+F2 and type “qjoypad” in the window.
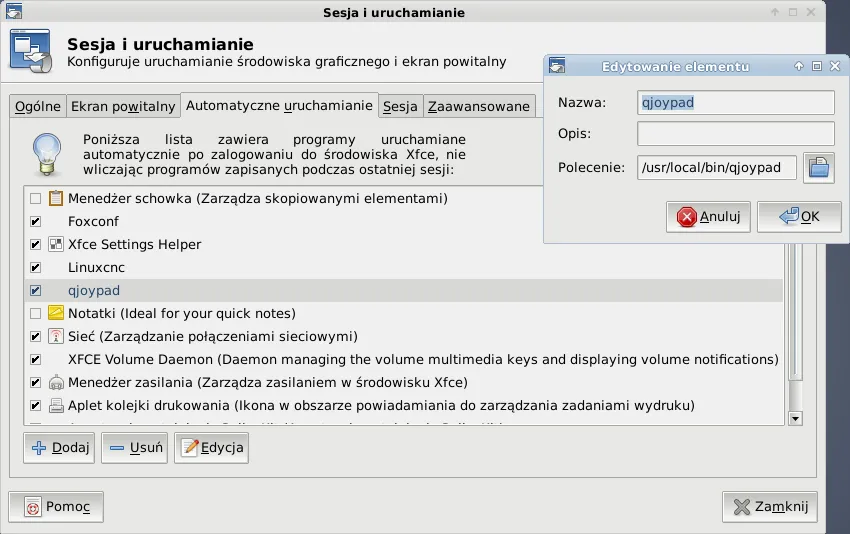
Figure 1. Adding qjoypad to autostart
Configuration
The installation is finished, so now it’s time to configure the program. I do not recommend using the “quick set” button to configure the Sixaxis keys, because the sensitive accelerometer axes are very easily assigned to buttons by mistake.
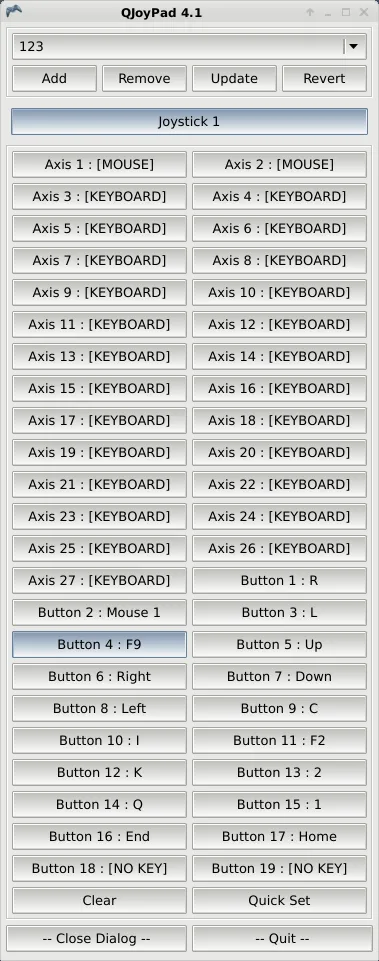
Figure 2. The main window of QjoyPad
When configuring an axis, you can use sliders to set its maximum and minimum sensitivity. Axes can control keys or the mouse. For keys there are no additional settings, whereas for the mouse you can set the speed, the sensitivity and the response function: linear, quadratic, power, and so on.
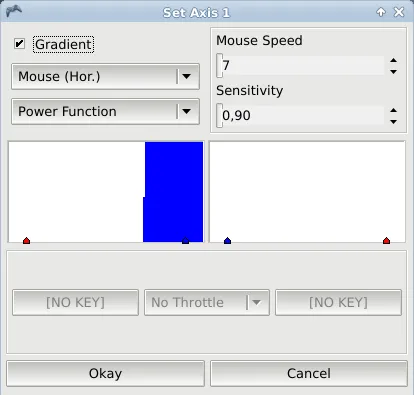
Figure 3. Axis configuration in QjoyPad
Setting up buttons is simpler. You only choose the keyboard key that the pad button should correspond to. Optionally, you can tick two boxes that change how the button responds to a press:
- STICKY: the key “sticks” when pressed, that is, it stays held until you press it again to release it
- RAPID FIRE: the button pulses, switching rapidly on and off, intended for shooter-type games
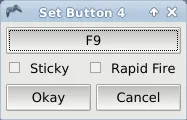
Figure 4. Button configuration in QjoyPad
To make things easier, the table below lists all the keys of the Sixaxis pad together with an example assignment for each.
Axis and button configuration for the PlayStation 3 pad:
| Key or axis in QjoyPad | Key or axis on the Sixaxis | Example function in the program | Description |
|---|---|---|---|
| AXIS1 | Left analog stick, horizontal | Mouse (Hor.) | Horizontal mouse movement |
| AXIS2 | Left analog stick, vertical | Mouse (Vert.) | Vertical mouse movement |
| AXIS3 | Right analog stick, horizontal | No key, No key | -, - |
| AXIS4 | Right analog stick, vertical | KP_Page up(9), KP_Page down(3) | Z axis up, down |
| Axis 24 | Tilting the pad right/left | KP_5, KP_7 | Keys 5, 7 |
| Axis 25 | Tilting the pad forward/back | ENTER, ESC | ENTER, ESC |
| Axis 26 | Moving the pad up/down | No key, No key | -, - |
| Axis 27 | Rotating the pad around its axis | No key, No key | -, - |
| B1 | SELECT | r | Run program |
| B2 | Left analog stick button | LEFT MOUSE BUTTON | Left mouse click |
| B3 | Right analog stick button | l | Ignore limits |
| B4 | START | F9 | Spindle start/stop |
| B5 | UP | KP_UP(8) | Move Y axis up |
| B6 | RIGHT | KP_RIGHT(6) | Move X axis right |
| B7 | DOWN | KP_DOWN(2) | Move Y axis down |
| B8 | LEFT | KP_LEFT(4) | Move X axis left |
| B9 | L2 | c | Continuous axis movement |
| B10 | R2 | k | Decrease step increment |
| B11 | L1 | F2 | LinuxCNC start/stop |
| B12 | R1 | i | Increase step increment |
| B13 | Triangle | 2 | Increase axis speed |
| B14 | Circle | KP_0 | Clear the plot |
| B15 | X | 1 | Decrease axis speed |
| B16 | Square | END | Set the range of the selected axis |
| B17 | PlayStation button | HOME | Home the selected axis |
With the configuration from the table, we have access to all the important machine functions. In addition, because the numeric keys are used for axis movement, we can reach all the digits from 0 to 9. We only have to remember where we assigned them. Moving the pad forward confirms a selection, while moving it back cancels it. The right analog stick can only control the Z axis, up and down. Assigning other keys to left and right made the readings very unstable. The button of this stick is assigned to the “l” key, which ignores limits and is most often used when an axis is jammed. Just in case, we can also control the mouse and use the left mouse button.
For the mill to be controlled this way, we have to modify our LinuxCNC axis file a little. In Debian, press Alt+F2 and type gksu Thunar. After you enter the password, a file browser with root (administrator) privileges opens. In the system directory usr/bin, look for the file axis. Open it in the gedit editor, as it is the most convenient to use. gedit is not installed by default in Debian, so type this in the terminal:
sudo apt-get install geditAfter opening the file in gedit, we change the key definitions so that the pad is comfortable to use. In the axis file, look for these lines:
1. root_window.bind("<Escape>", commands.task_stop)
2. root_window.bind("i", lambda event: jogspeed_incremental())
3. root_window.bind("I", lambda event: jogspeed_incremental(-1))
4. root_window.bind("<Home>", commands.home_axis)
5. root_window.bind("<KP_Home>", kp_wrap(commands.home_axis, "KeyPress"))
6. root_window.bind("<Control-Home>", commands.home_all_axes)
7. root_window.bind("Control-k", commands.clear_live_plot)
All the useful keys must be changed so that they can be pressed without Shift or Ctrl. So we change the “capital I” key to “k” and “Ctrl+K” to numeric zero. In addition, homing all axes can be set to simply “Home” and homing a single axis to “Ctrl+Home”. The Escape key is disabled so that it does not interrupt the work when the pad is moved backwards. We change the lines to:
1. root_window.bind("<Escape>", "#nothing")
2. root_window.bind("i", lambda event: jogspeed_incremental())
3. root_window.bind("k", lambda event: jogspeed_incremental(-1))
4. root_window.bind("<Home>", commands.home_all_axes )
5. root_window.bind("<KP_Home>", kp_wrap(commands.home_all_axes, "KeyPress"))
6. root_window.bind("<Control-Home>", commands.home_axis)
7. root_window.bind("KP_0", commands.clear_live_plot)
It is also convenient to change the travel speed with two keys, e.g. “1” decreases the speed and “2” increases it. We change the contents of the function activate_axis_or_set_feedrate(n):
def activate_axis_or_set_feedrate(n):
ustawiona_predkosc = widgets.feedoverride.get()
if n == 0:
set_feedrate(0)
if n == 1:
ustawiona_predkosc -= 5
if ustawiona_predkosc < 0:
ustawiona_predkosc = 0
set_feedrate(ustawiona_predkosc)
if n == 2:
ustawiona_predkosc += 5
if ustawiona_predkosc > 100:
ustawiona_predkosc = 100
set_feedrate(ustawiona_predkosc)
if n>2:
set_feedrate(n*10)
This gives us a fully functional controller for our machine: full control of 3 axes, speed and step adjustment, homing, setting offsets and switching the spindle on. On top of that, we have access to the full numeric keypad, plus selection confirmation and cancellation. The only drawback is the considerable price of new PS3 pads, but you can always buy a used one. After configuring Bluetooth, the pad can be used wirelessly; we haven’t done that yet. What more could you want from such a small, handy controller?